How to Restore Your Data
There are two main ways to restore your data using Gotbackup.
1. Restore to the Computer You Installed Gotbackup On
If you need to restore to the computer where you already have Gotbackup installed, follow these steps. This is useful if you accidentally delete / overwrite a file or if you need to access an older version of a file.
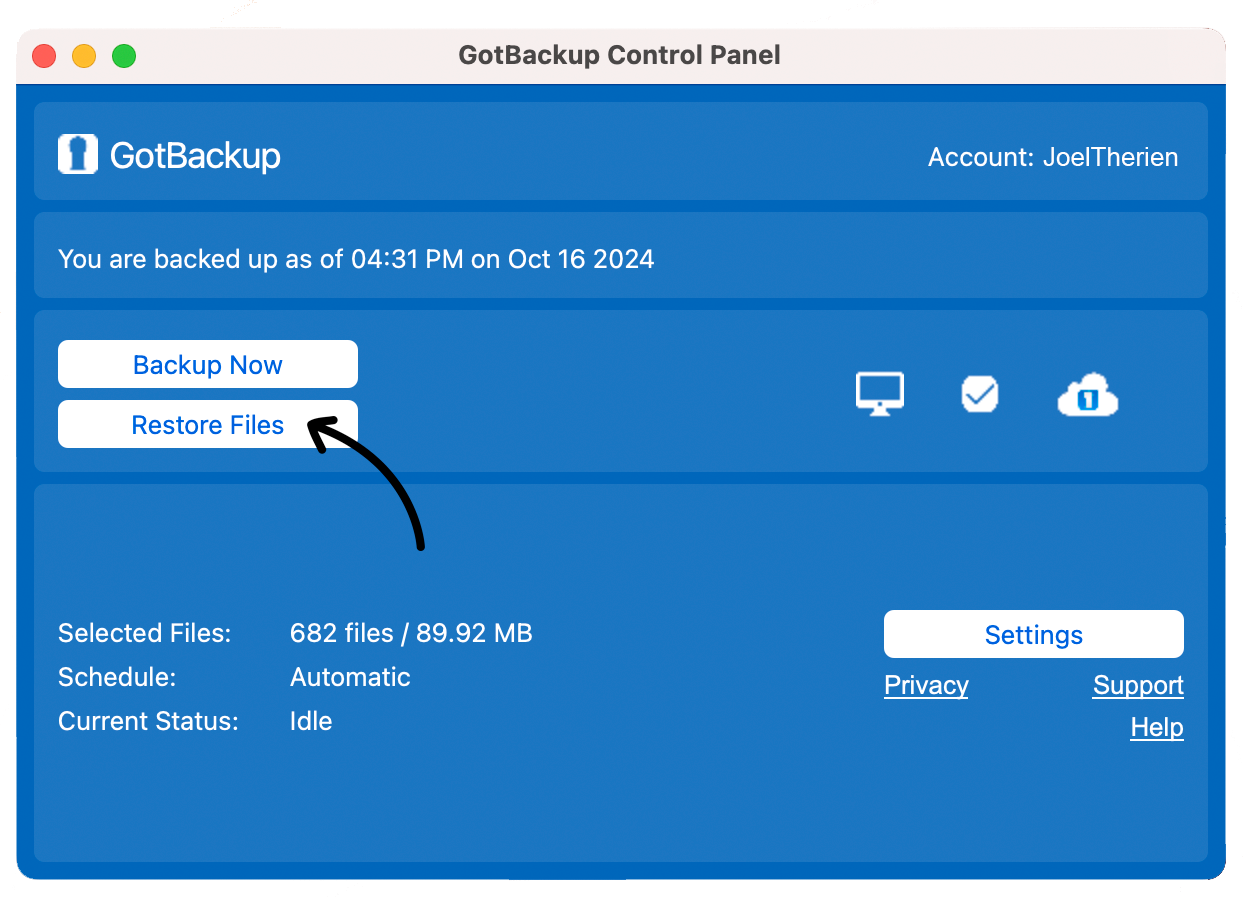
Step 1: Open the Gotbackup control panel.
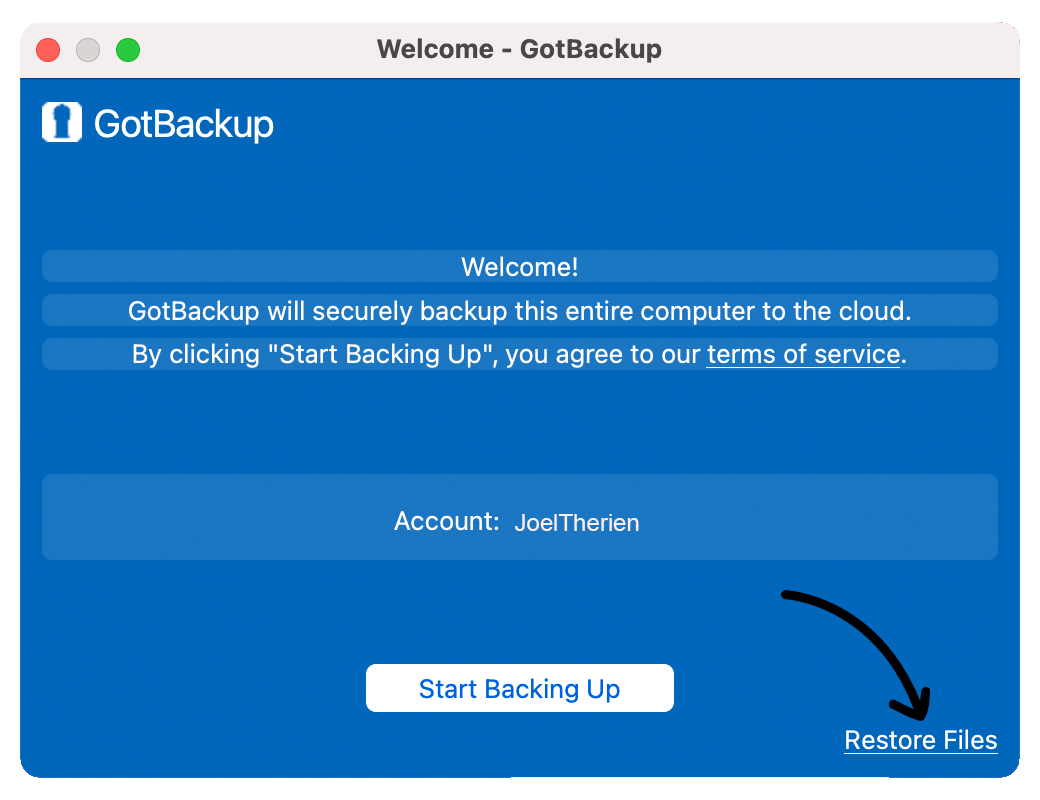
Step 2: Click the Restore Files button (see below).
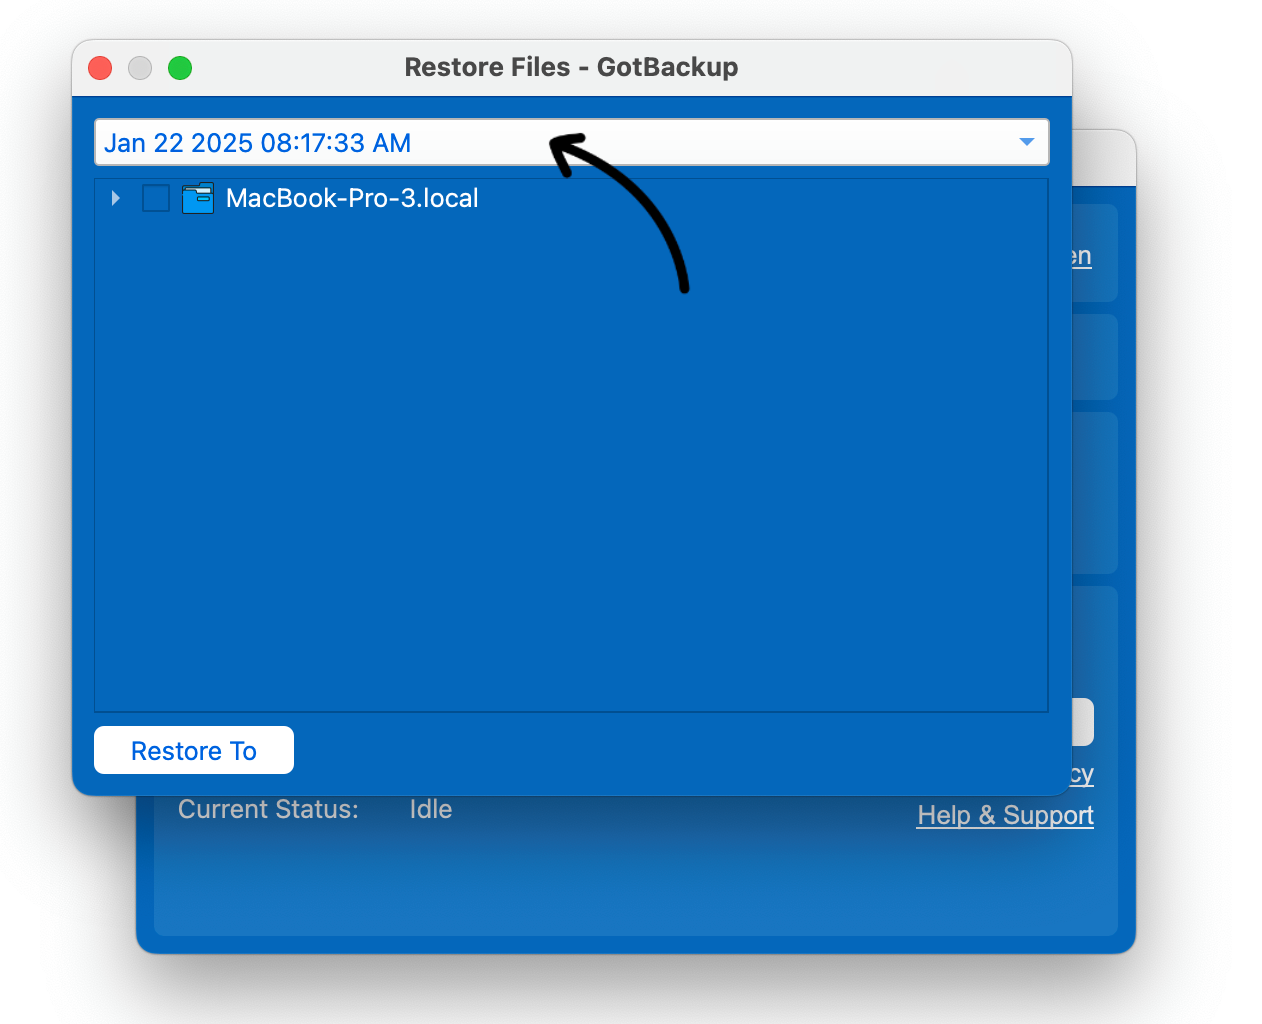
Step 3: Wait for the File Tree to load.

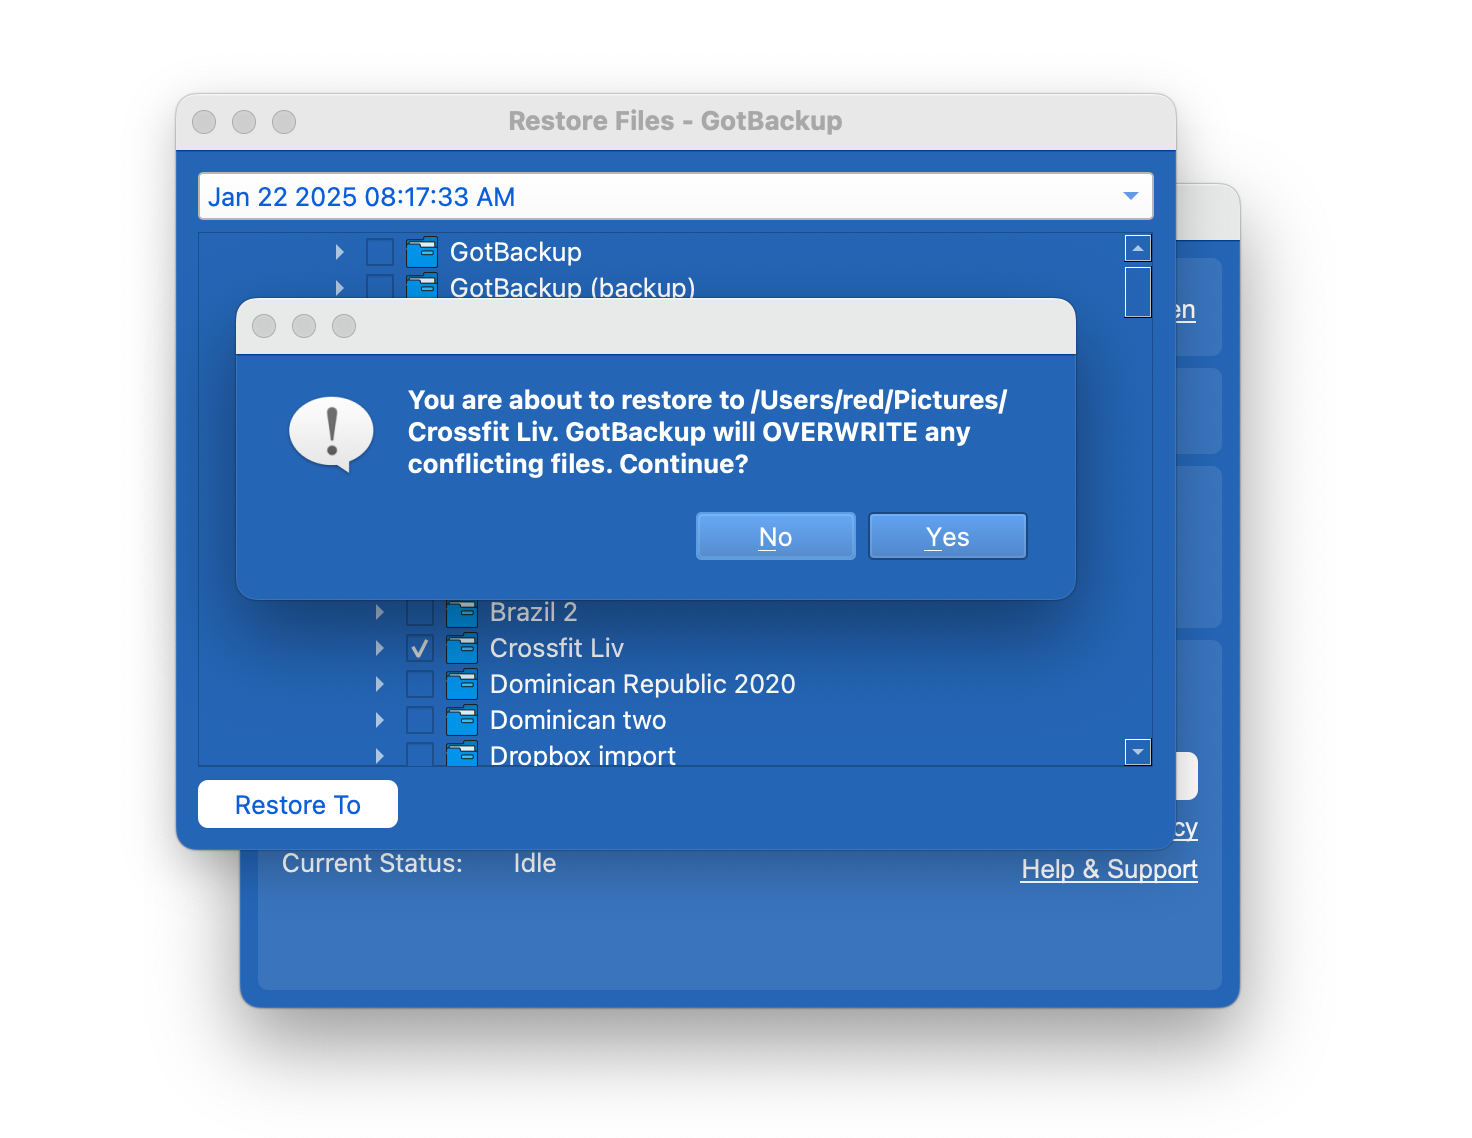
Step 4: Choose the date you want to restore from.
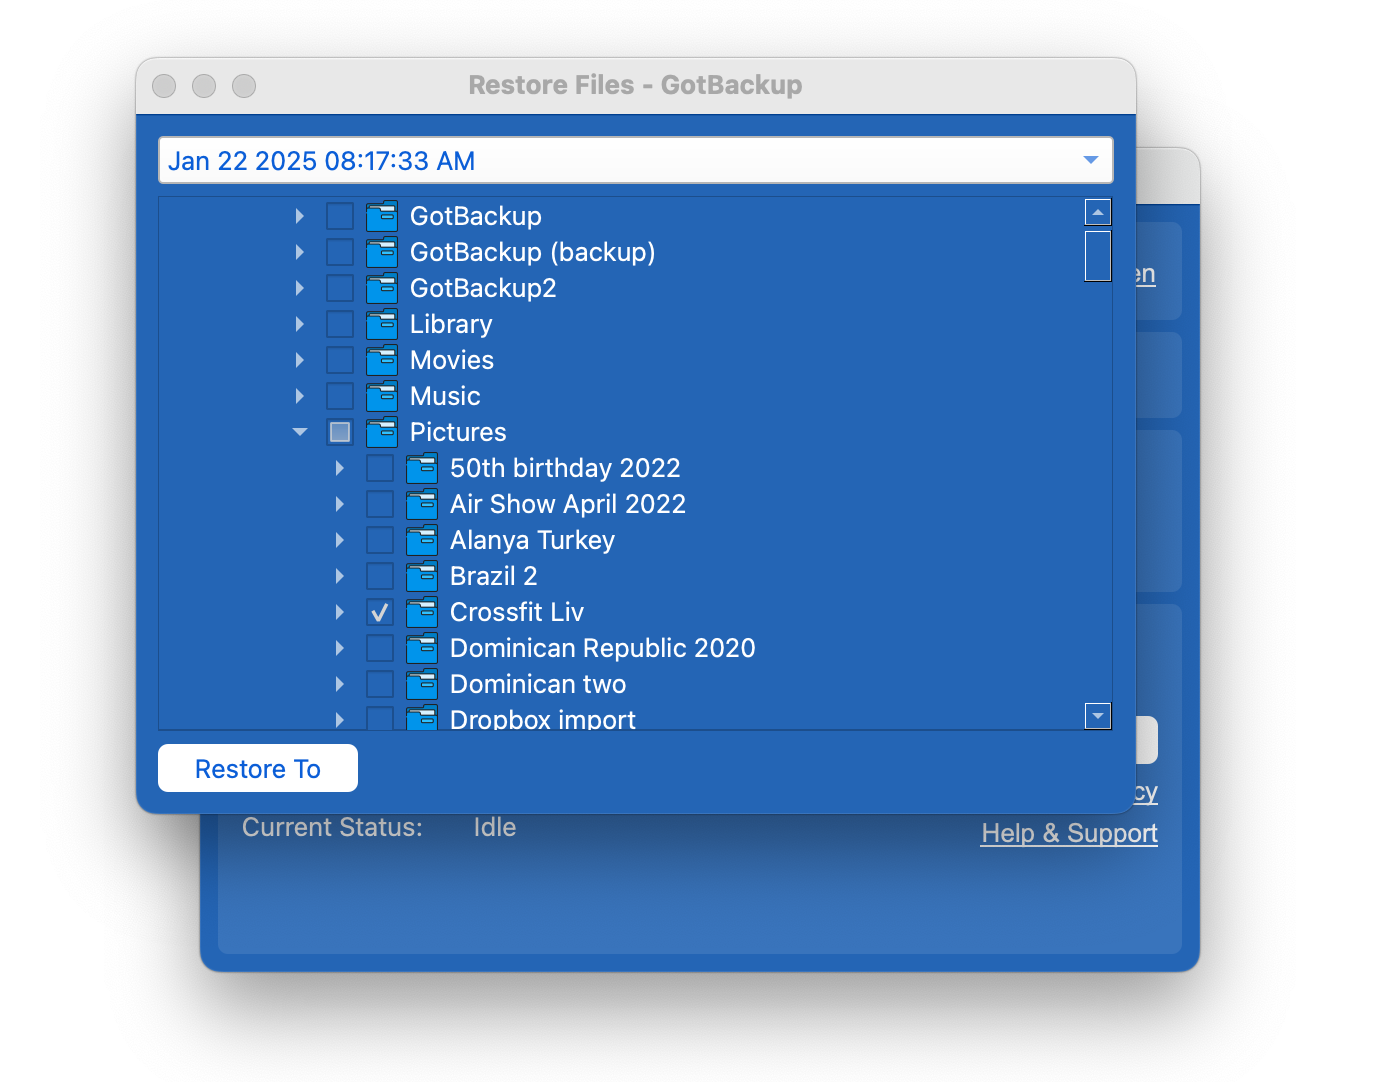
Step 5: Select the data you want restored. Check the box next to the files or folders you want to restore.
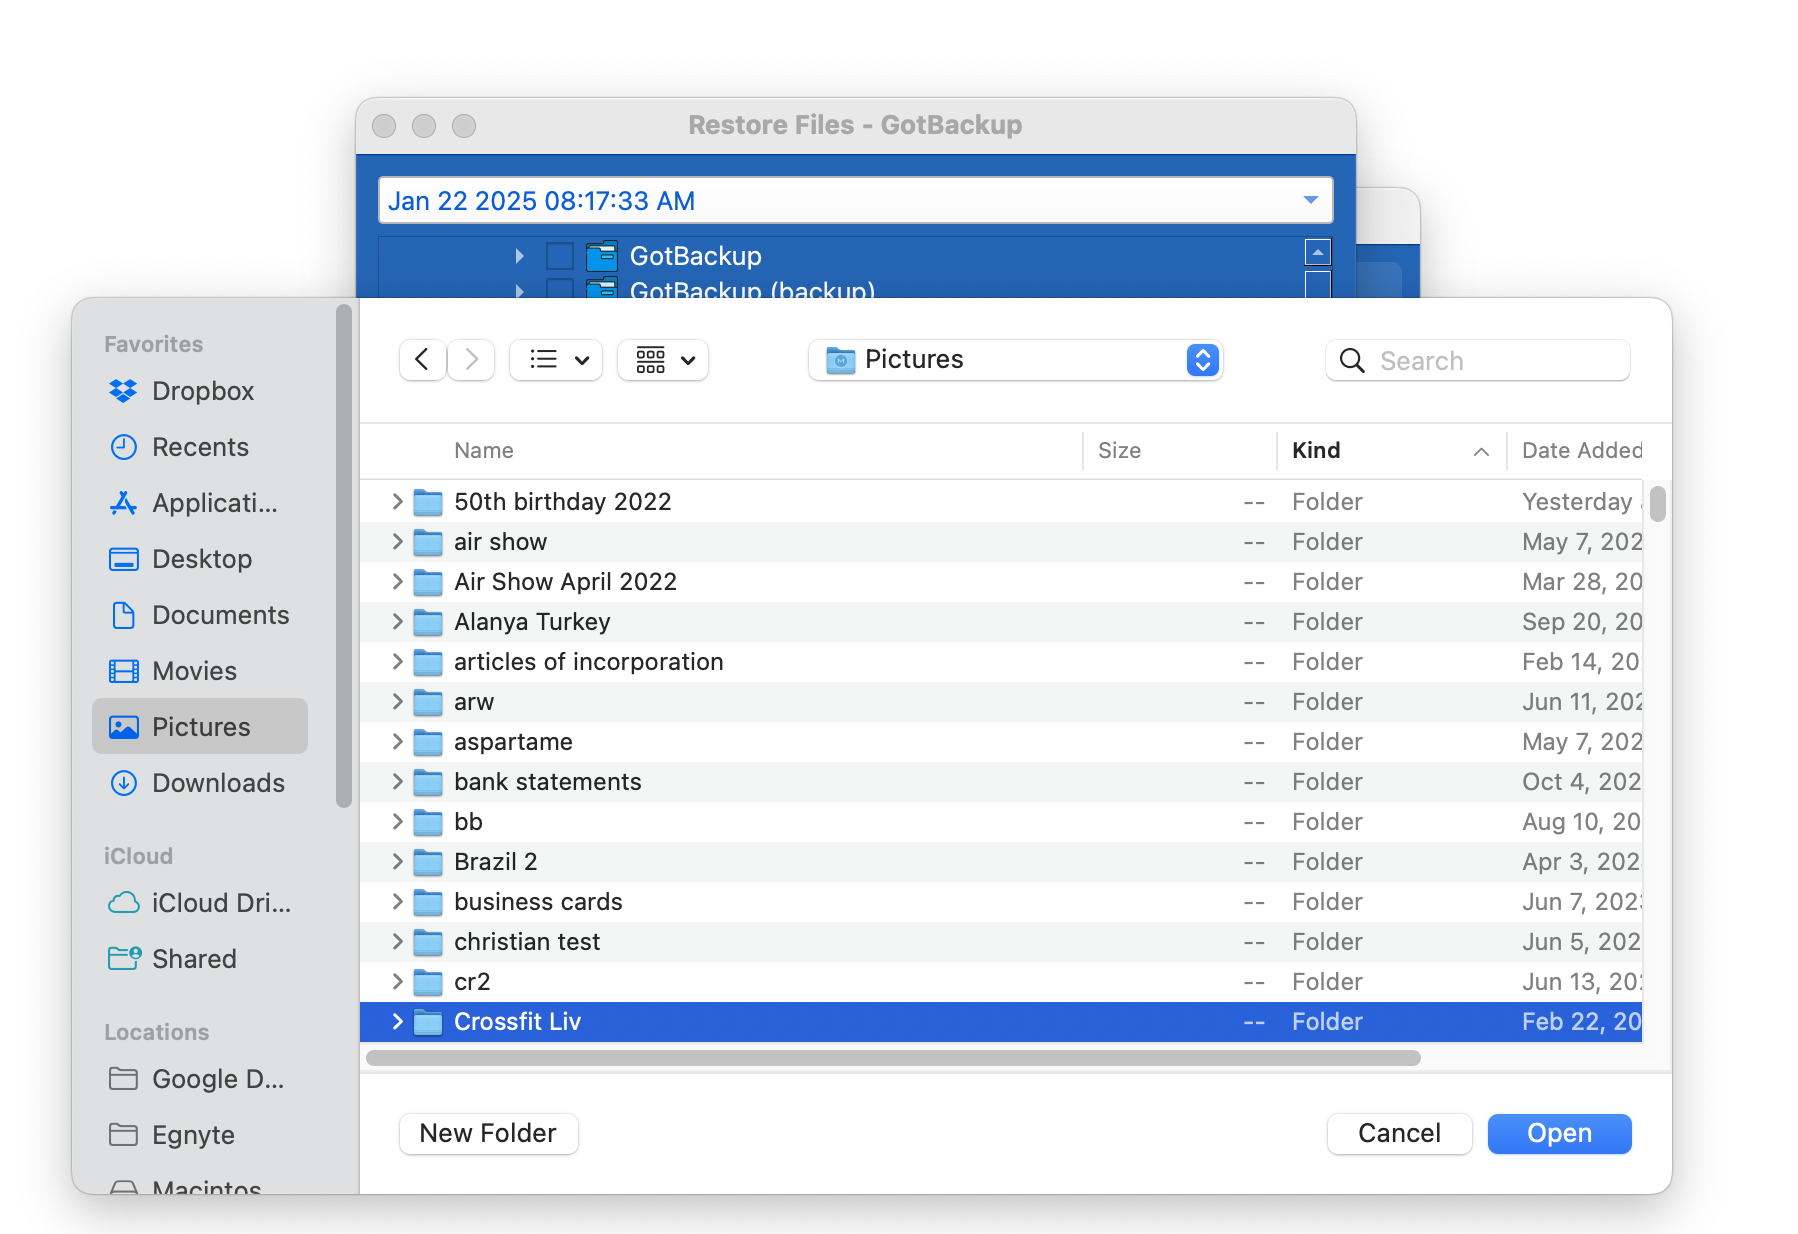
Step 6: Select a folder on your computer where you want to restore the files. Click the Restore To button.
Step 7: The application will warn you that all files with the same names as the files being restored will be replaced with the new ones.
2. Restore to a Computer Where You Don't Have Gotbackup Installed
If you need to restore to a computer where you don't have Gotbackup installed, follow these steps. This is useful if the computer you had Gotbackup installed on became compromised (eg: hard drive crash, theft, ransomware, coffee spill, etc).
Step 1: Download and install Gotbackup.
For detailed instructions on Windows 10 and 11 click here
For detail instructions on Mac OS click here
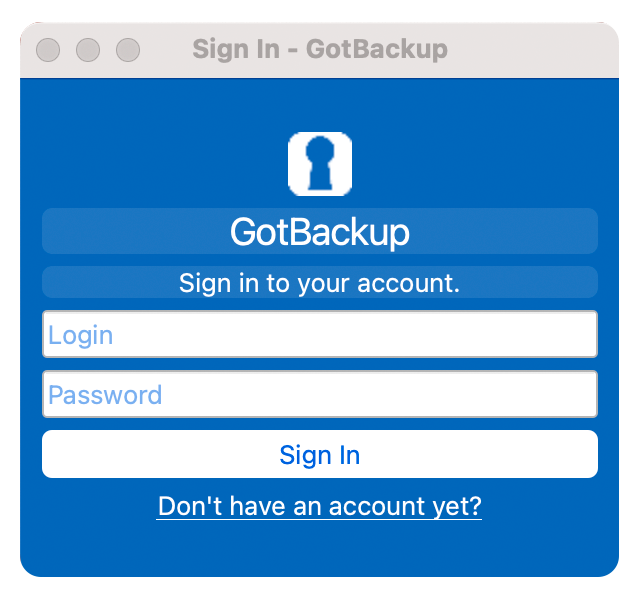
Step 2: Sign in
Step 3: Click the Restore Files button (see below).
Step 4: Select the computer you want to restore from.
Step 5: Select the data you want restored.